How to create a plugin
Evoplex was created to hopefully make it simple for you to create a plugin, which can be either a model or a graph generator. As the plugins are written in C++, you'll need to install a few dependencies to be able to compile them.
The easiest way to create your first plugin is to look at some of the examples that we provide here. Thus:
- Download (or clone via Git) one of them;
- Install the dependencies;
- Compile from scracth to generate the dynamic library file (
.soon Linux,.dllon Windows and.dylibon macOS); - Load and run the plugin on Evoplex.
Download a template
We provide a template with the essential files for you to create a new plugin.
Thus, you can either follow a Git workflow (i.e., fork the repository on GitHub, and clone it to your computer) or just download the zip archive provided below.
To create a model:
- Git repository - https://github.com/evoplex/minimal-model
- Zip archive - https://github.com/evoplex/minimal-model/archive/master.zip
To create a graph generator:
- Git repository - https://github.com/evoplex/minimal-graph
- Zip archive - https://github.com/evoplex/minimal-graph/archive/master.zip
Directory structure
Any plugin has at least the following files:
├── CMakeLists.txt
├── metadata.json
├── plugin.h
└── plugin.cpp
CMakeLists.txtwhich does not need to be changed by the modeller and is just a CMake script to ease the compilation process and make it portable across different compilers and IDEs.metadata.jsonwhich holds the definition of all the attributes of the plugin.plugin.hwhich contains the plugin's header file.plugin.cppwhich contains the plugins' source code.
Note: you should not rename any of those files.
The metadata.json file
After downloading a template, the first thing you should do is edit the metadata.json file to refer to your needs.
Besides the fields used to identify your plugin (e.g., type, id, description etc.), this file is important because it defines all the attributes of your plugin.
If you started from the
minimal-model, your metadata.json file should look like:
{
  "type": "model",
  "uid": "minimalModel",
  "version": 1,
  "title": "Mininal Model",
  "author": "Evoplex Team",
  "description": "This is a mininal example of a model plugin for Evoplex.",

  "pluginAttributesScope": [],
  "nodeAttributesScope": [],
  "edgeAttributesScope": [],

  "supportedGraphs": [],
  "customOutputs": []
}
If you started from the
minimal-graph, your metadata.json file should look like:
{
  "type": "graph",
  "uid": "minimalGraph",
  "version": 1,
  "title": "Mininal Graph",
  "author": "Evoplex Team",
  "description": "This is a mininal example of a graph plugin for Evoplex.",

  "pluginAttributesScope": [],
  "supportsEdgeAttrsGen": true,
  "validGraphTypes": ["undirected", "directed"]
}
Mandatory fields
type- The plugin's type, i.e.,modelorgraph.uid- An unique id (without spaces) to be used by Evoplex to identify this plugin.version- The current version of your plugin. It must be an integer.title- The title of your plugin.author- The name(s) of the author(s) of this plugin.description- A short description of what this plugin does.
Optional fields
pluginAttributesScope- An array of objects defining all the attributes (inputs) of your plugin. In Evoplex, those attributes will be exposed to the user as the inputs of your model/graph (click here for details).
Optional fields for models
nodeAttributesScope- An array of objects defining all the nodes' attributes (click here for details).edgeAttributesScope- An array of objects defining all the edges' attributes (click here for details).customOutputs- An array of strings defining the name of any custom output that you want to implement in theplugin.cppfile.supportedGraphs- An array of strings (graph uids) defining the supported graphs for the model. Leave empty (or remove) to allow any graph. For instance, to support only thesquareGridand thecyclegraphs, this field would be set as follows:{ "supportedGraphs": ["squareGrid", "cycle"] }
Optional fields for graphs
validGraphTypes- An array of strings with the supported graph types, i.e.,directedand/orundirected.supportsEdgeAttrsGen-trueif the graph supports creating edges attributes via the Attributes Generator tool.
The Attributes Scope
The "attributes' scope" field is an array of objects where each object defines both the name and range of each attribute as follows:
{
"xxxxAttributesScope": [
    {"attribute_name1": "attribute_range1"},
    ...
    {"attribute_nameN": "attribute_rangeN"}
]
}
For instance, if your plugin needs to request an integer from 0 to 10 (assigned to variableA) from the user; the metadata.json file would have the line below.
{ "pluginAttributesScope": [ {"variableA": "int[0,10]"} ] }
Then, as shown in this screenshot, after compiling and loading the plugin in Evoplex, the variableA will be displayed in the Experiment Designer tool.
The plugin.h file
If you are creating your plugin from the minimal-model or any other existing plugin, you should rename the #ifndef and #define directives, and the class name to refer to your own plugin.
The virtual functions available for a model plugin are described here, and the functions available for a graph generator plugin are described here.
The plugin.cpp file
If you renamed the class name in the header file, make sure you adjust the plugin.cpp file as well.
The base classes

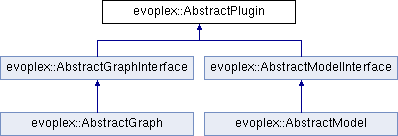
The model plugins are based on the AbstractModel class, while the graph plugins are based on the AbstractGraph class. Please, refer to the API documentation to know which functions are available in your plugin.cpp file.
